1 Downloading and Installing
The first step is to download the Bastion Tunnel application for your operating system. Make sure you have python installed on your device before you proceed to installation... Don't have python installed yet? Install PYTHON
- Visit our official Download Page.
- The page should automatically detect your operating system (Windows, macOS, or Linux) and highlight the recommended download. You can also manually select the installer for a different OS if needed. Please Note: Only the
.Zipfor Windows is currently available, for Mac users, we recommend you use a windows RDP. - Click the download button to get the installer file (I.e.,
.Zipfor Windows). - Once downloaded, unzip the file, run the installer (double click on 'create-shortcut') and follow the on-screen instructions. The installation process is straightforward.

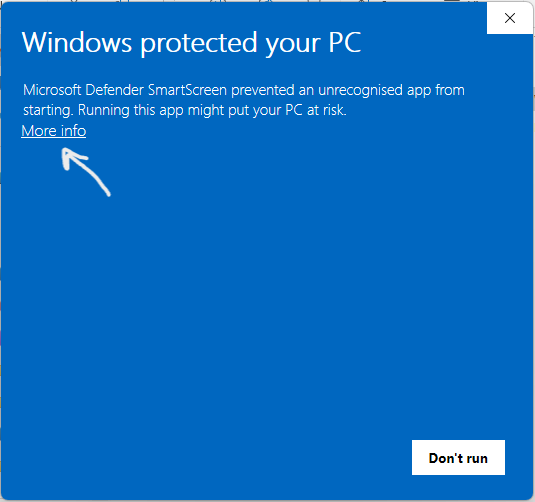
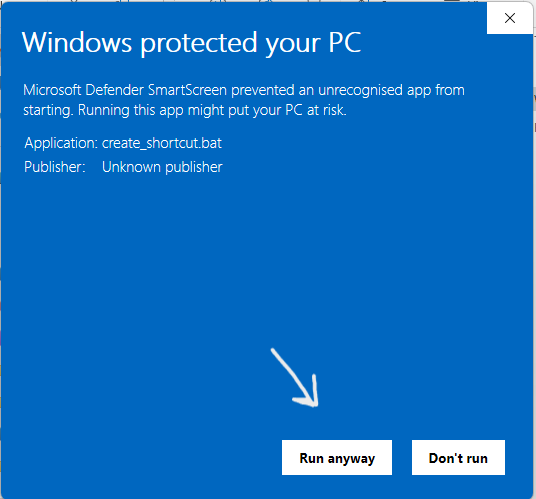
Tip: Kindly make sure to uncheck "Always ask before opening this file" for seemless app launching in the future.
If you encounter any issues during installation, please refer to our Installation Troubleshooting Guide.
2 Launching & Initial Setup
After successful installation, find the Bastion Tunnel icon on your desktop or in your applications folder and launch it.
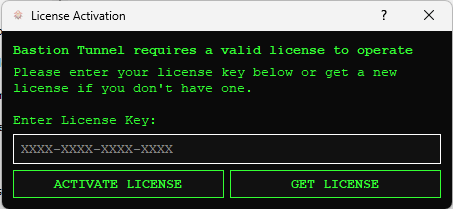
- On the first launch, you might be prompted to input a LICENSE KEY. This license key encrypts your profile data stored on your computer. **It is strong and uniquely generated, please store it safely.**
- Next, you'll need to obtain a license key for your Bastion Tunnel account. If you don't have one, you can GET ONE HERE or directly from the application.
3 Understanding the Interface
Once logged in, you'll be greeted by the Bastion Tunnel dashboard. Familiarize yourself with the main areas:
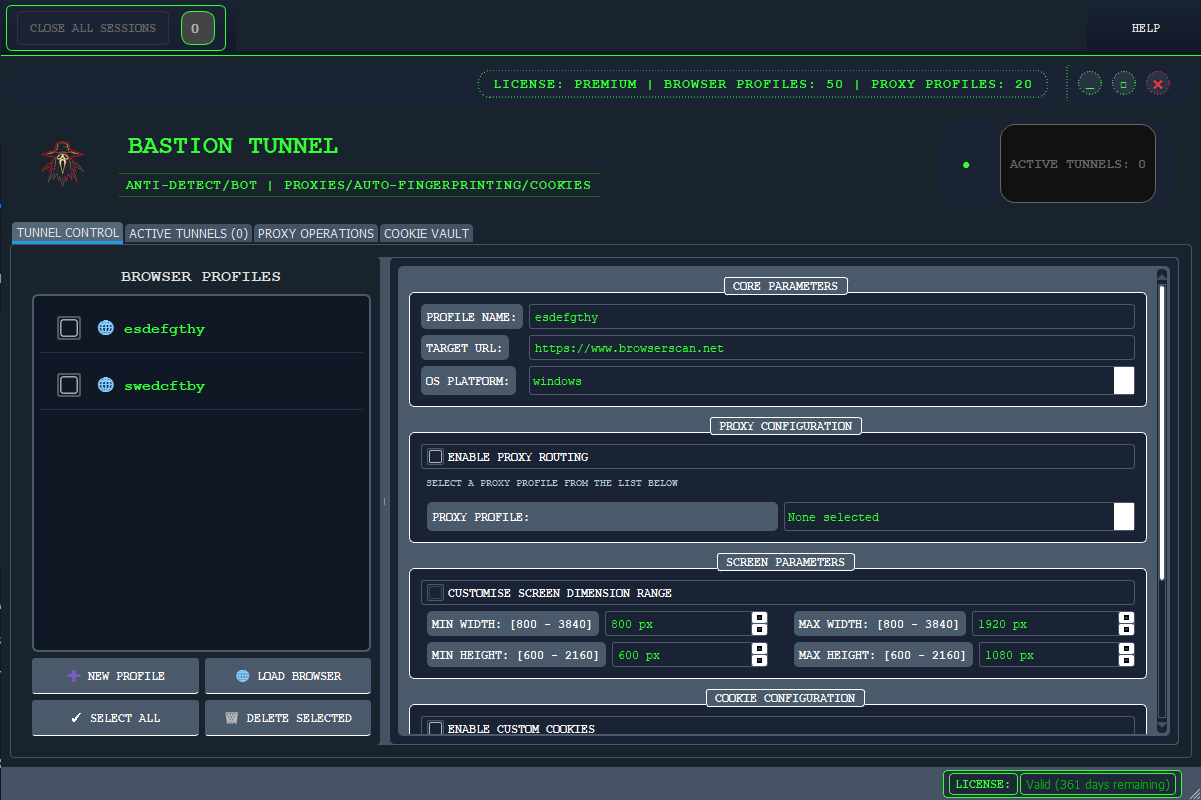
- Tunnel Control: Where you can; Create, Launch, Manage existing profiles, etc.
- Active Tunnel: Shows you list of active profiles in real-time.
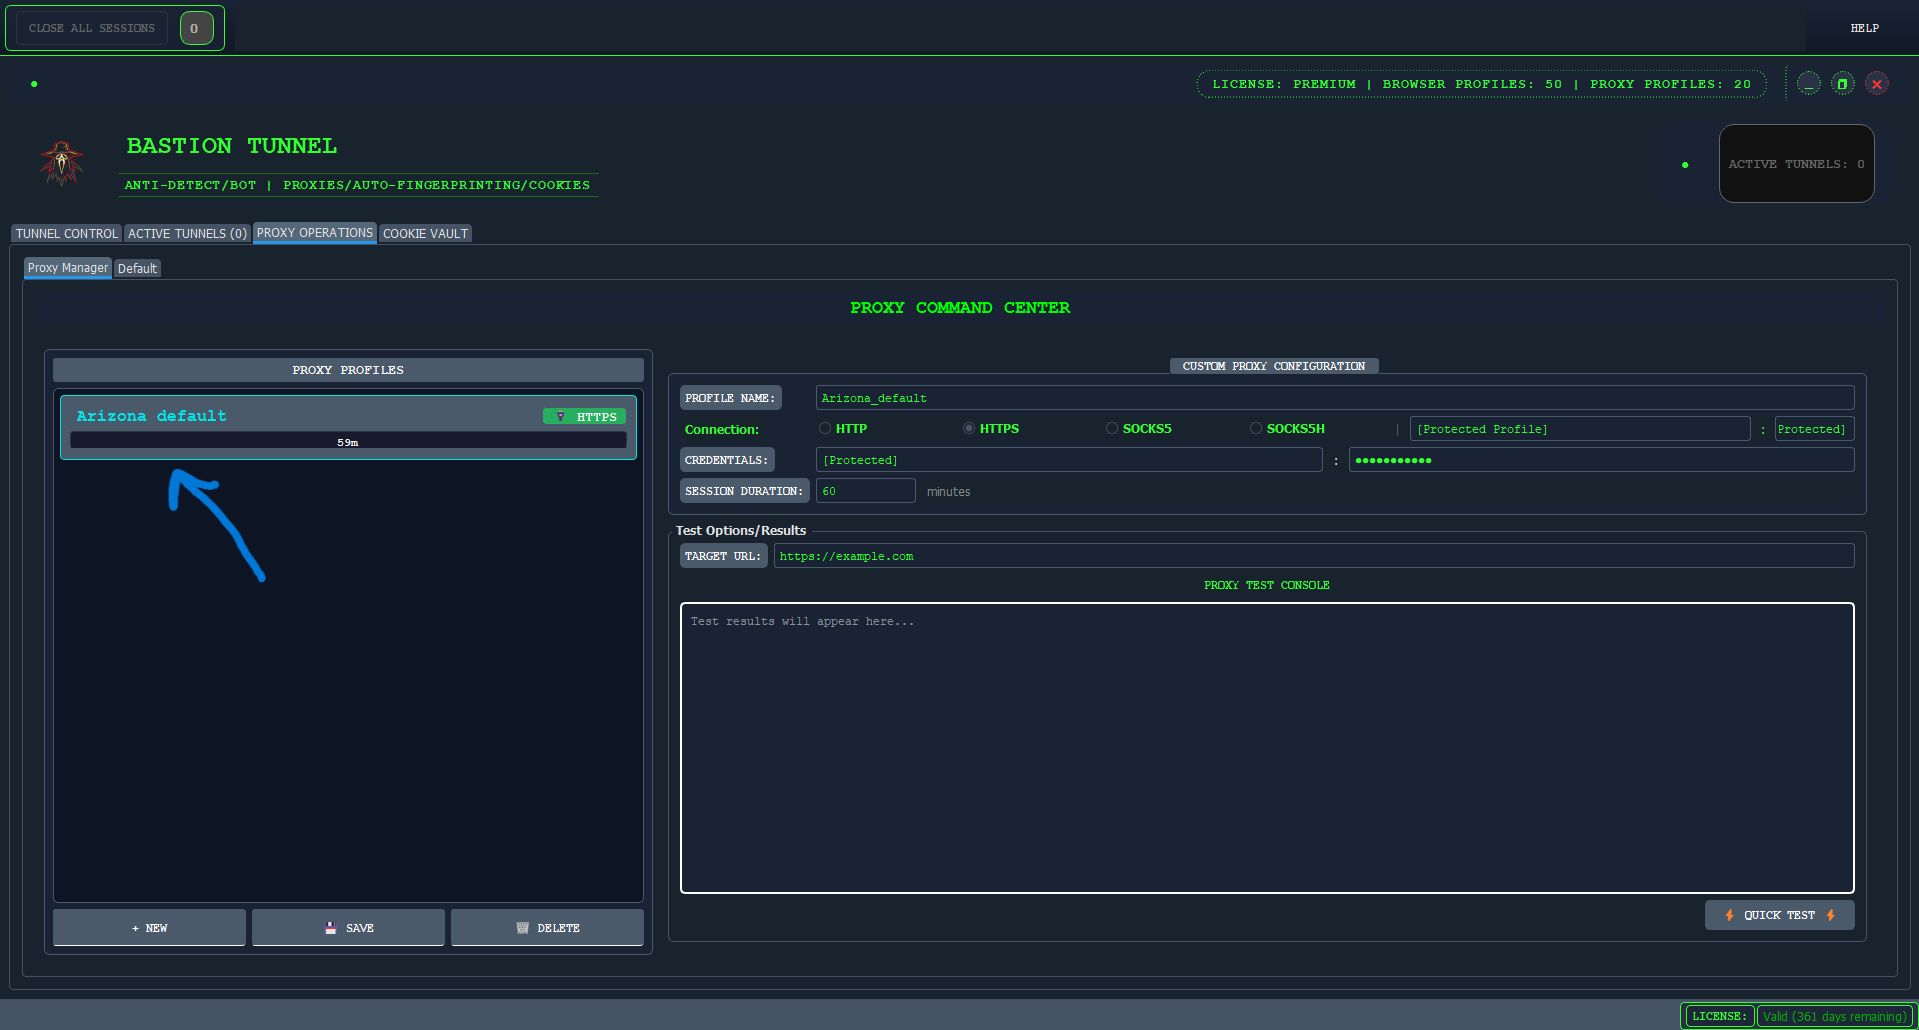
- PROXY OPERATIONS: Where you can create a proxy profile using our State of the Art BastionProxy™(Default), or create a CUSTOM proxy profile using your external proxy service.
- COOKIE VAULT: Gives you the flexibilty to attach external cookies to your existing profile. The Ultimate Flexibility
Take a few moments to explore the different sections to get a feel for where everything is located.
4 Creating Your First Proxy Profile
It is very important that you FIRST create a proxy profile as you will need to attach one when creating A browser profile. Here’s how to create one:
- Click on the "PROXY OPERATIONS" button (the third toggle after the Tunnel Control).
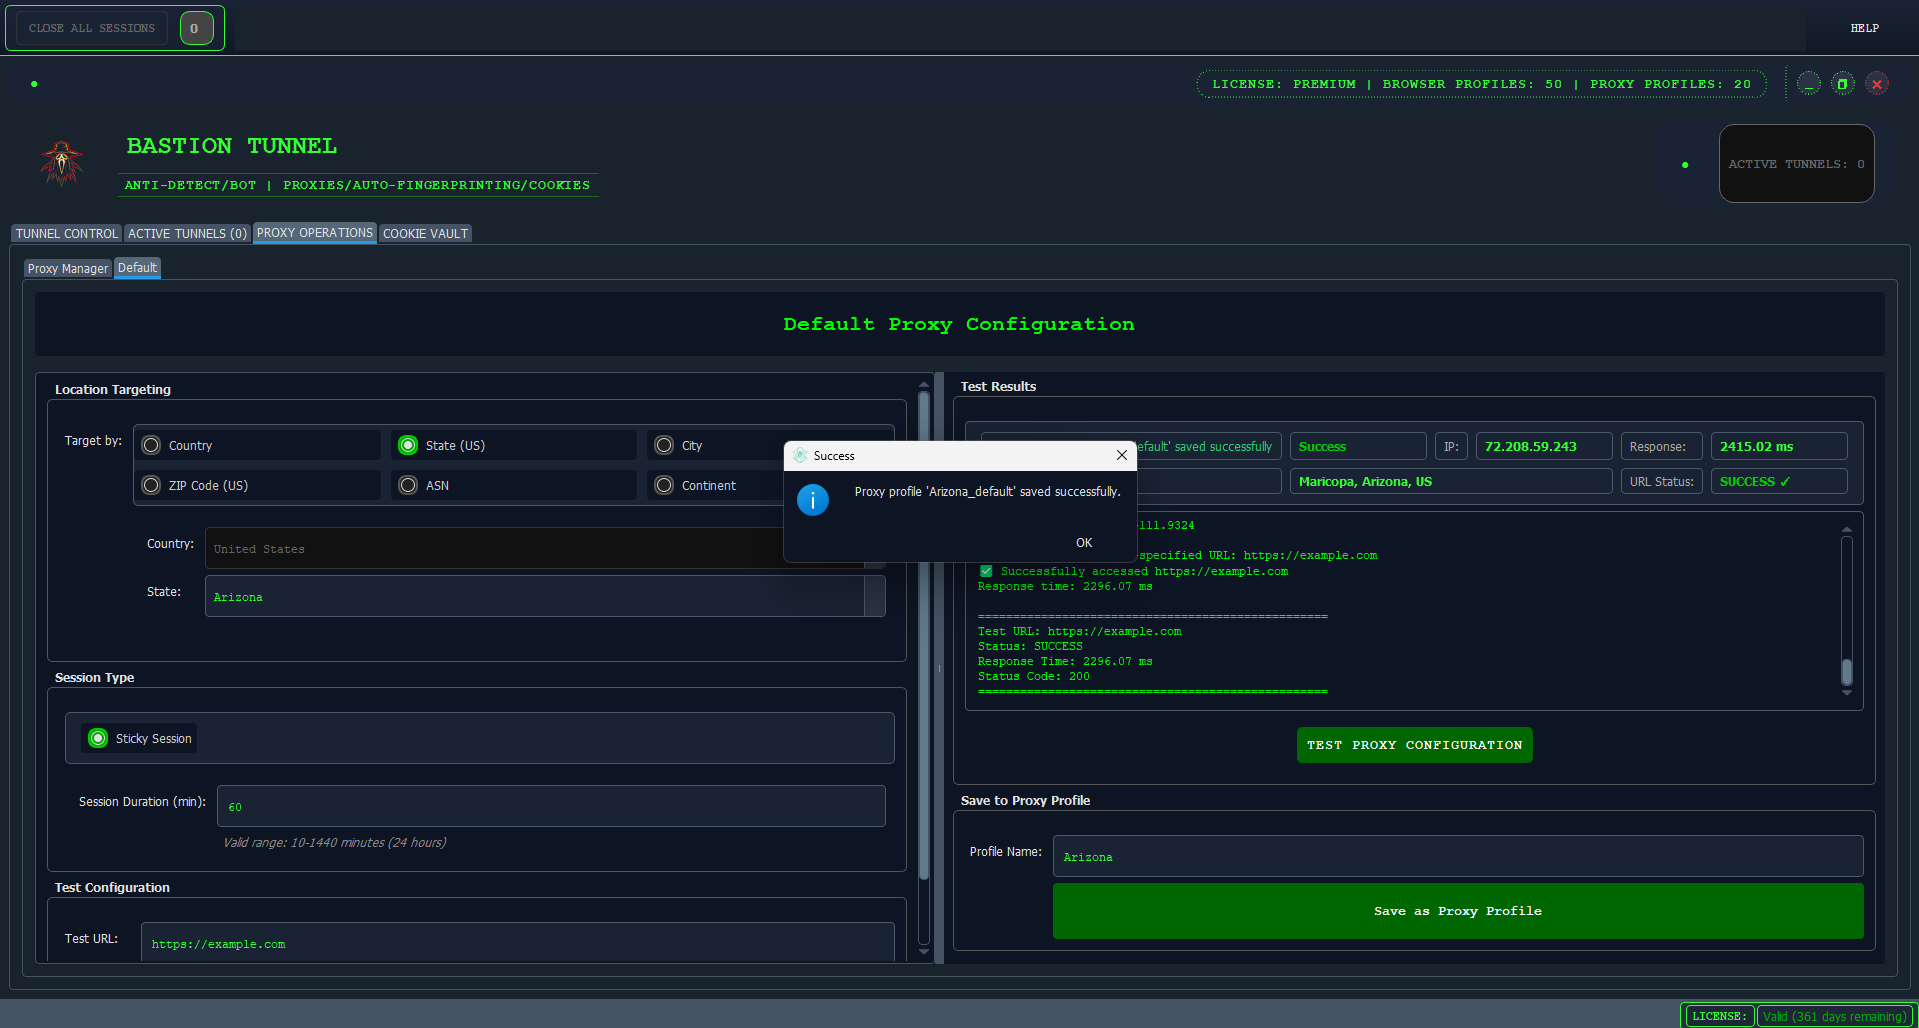
- Click on "DEFAULT' to use our BastionProxy™ or "PROXY MANAGER" to use your own external proxy).
- Set the location you would like to spoof to...
- You can choose the ideal website you are aiming to target or leave it at the default (Example.com). After that, click on "TEST PROXY CONFIGURATION"; once valid, you can then...
- Give your profile a descriptive name, ideally the name of the location your anonymous I.P will be in (e.g., "Arizona," "London").
- Then proceed to click on "SAVE AS PROXY PROFILe"
Your new proxy profile will now appear on the "Proxy Profiles" List on "PROXY MANAGER".
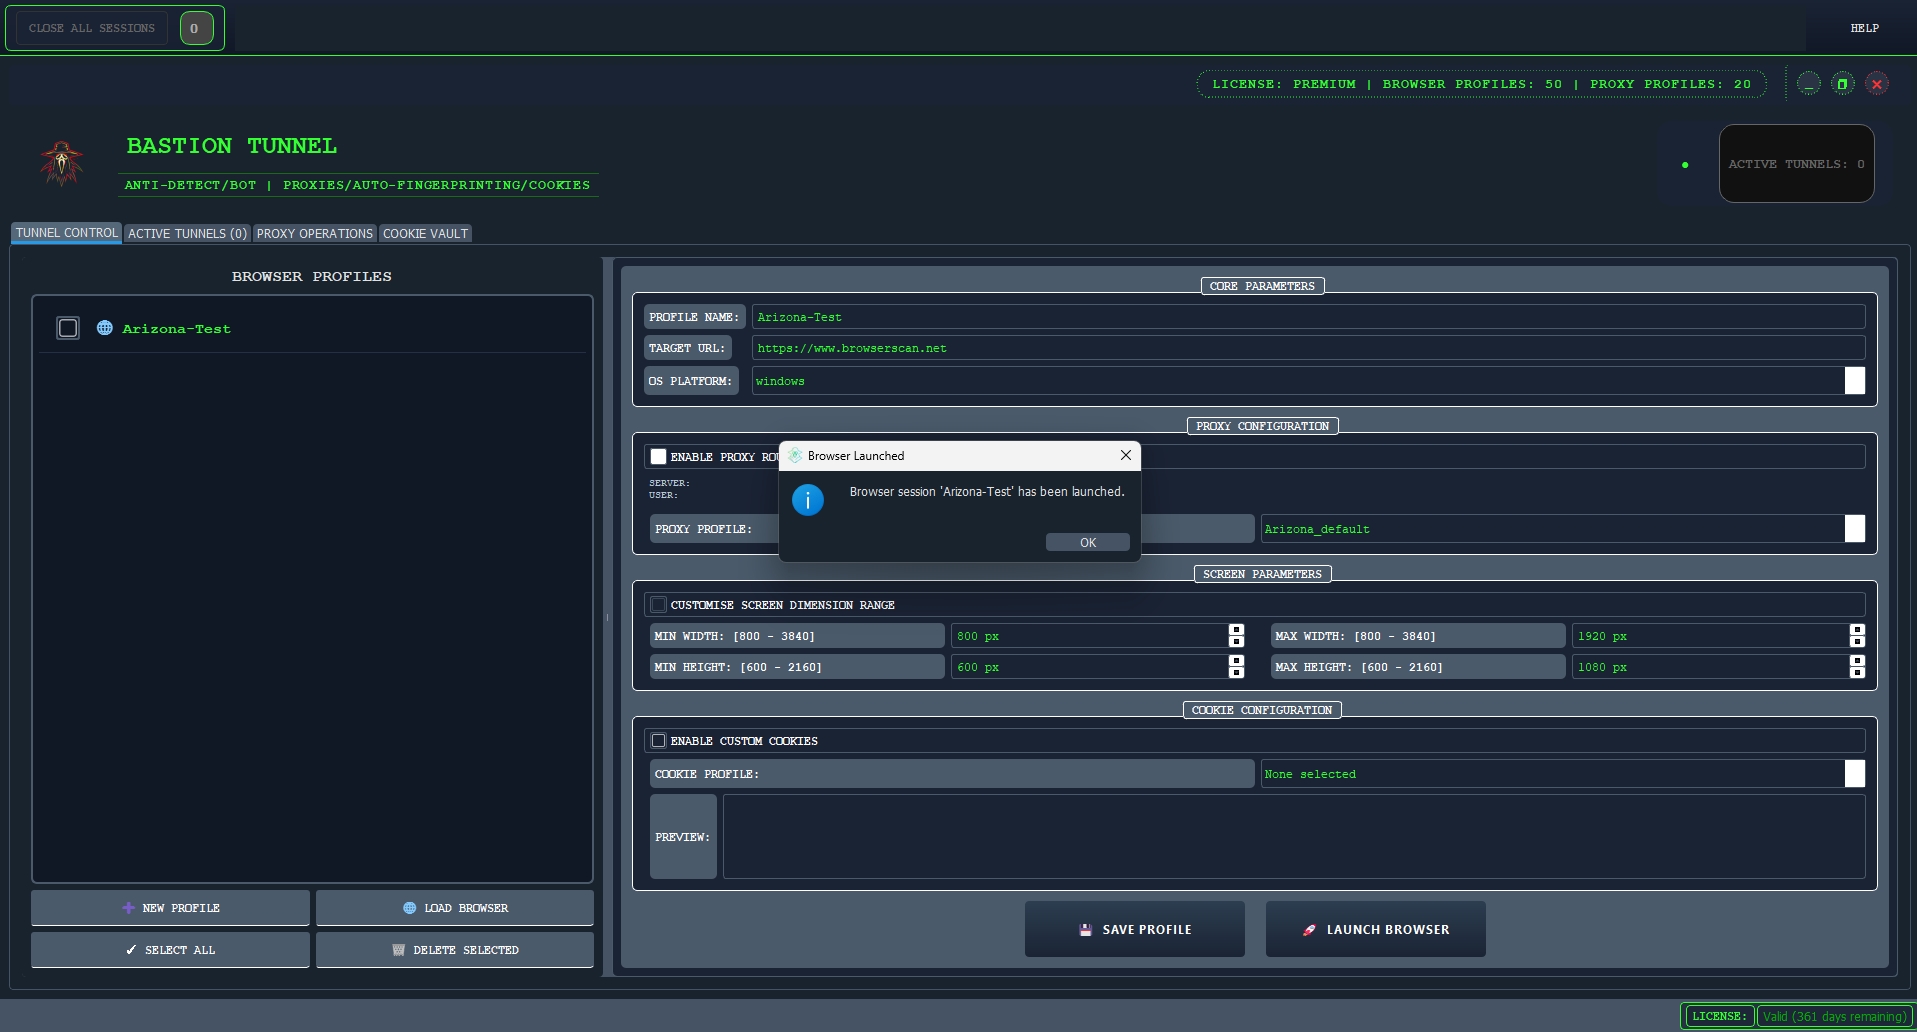
5 Creating Your First Browser Profile
A browser profile is an isolated environment with its own unique fingerprint, cookies, cache, and proxy settings. Here’s how to create one:
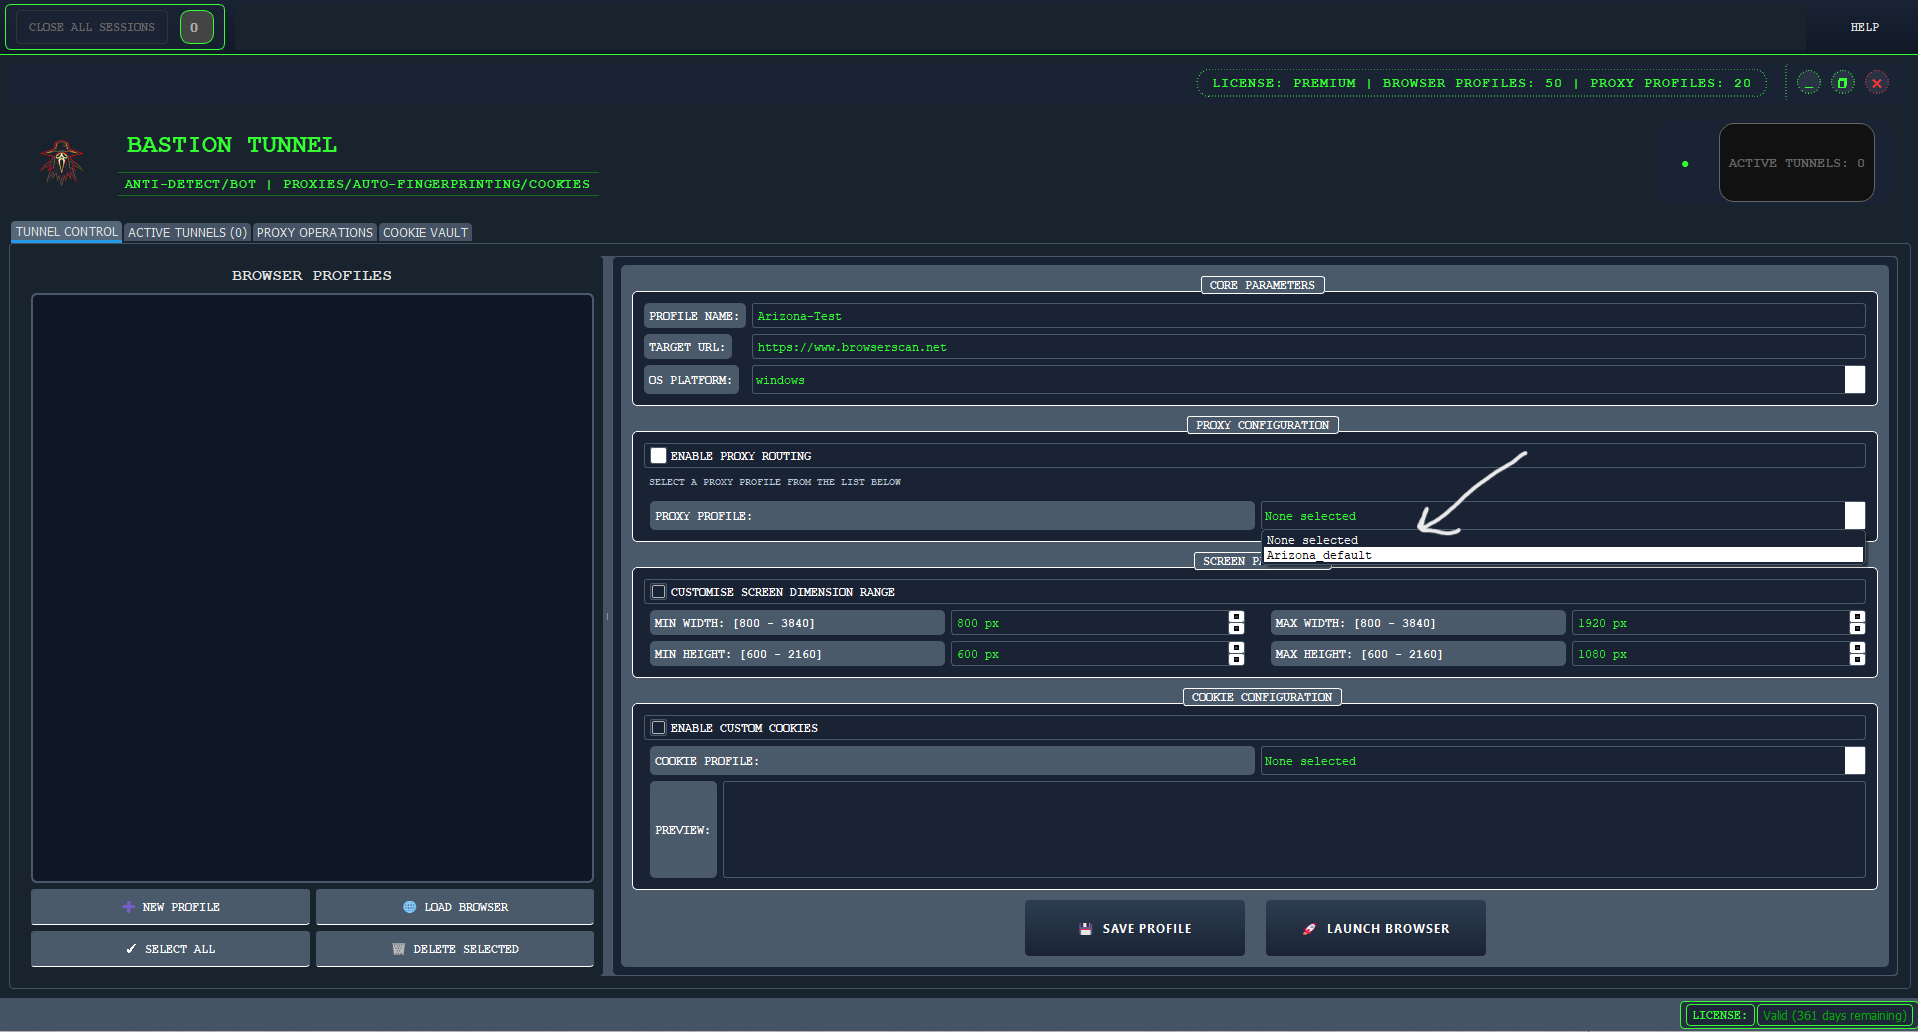
- Click on the "New Profile" button (prominently displayed on the dashboard/TUNNEL CONTROL screen).
- Give your profile a descriptive name (e.g., "Amazon Seller US," "Facebook Ads Client X").
- Click on "ENABLE PROXY ROUTING", Select the proxy profile you created earlier, in this tutorial case that will be "Arizona".
- Customize screen dimensions or choose to leave it at default.
- **Configure Fingerprint Settings:** This is crucial for anonymity. Bastion Tunnel provides many parameters. For your first profile, you might:
- Select a base Operating System (e.g., Windows, macOS).
- Choose a User-Agent string or let Bastion Tunnel generate a realistic one.
- No need to Adjust settings like Canvas, WebGL, Fonts, Timezone, and Geolocation. Our system provides smart defaults based on your chosen OS.
- Explore other tabs for settings like startup pages, etc.
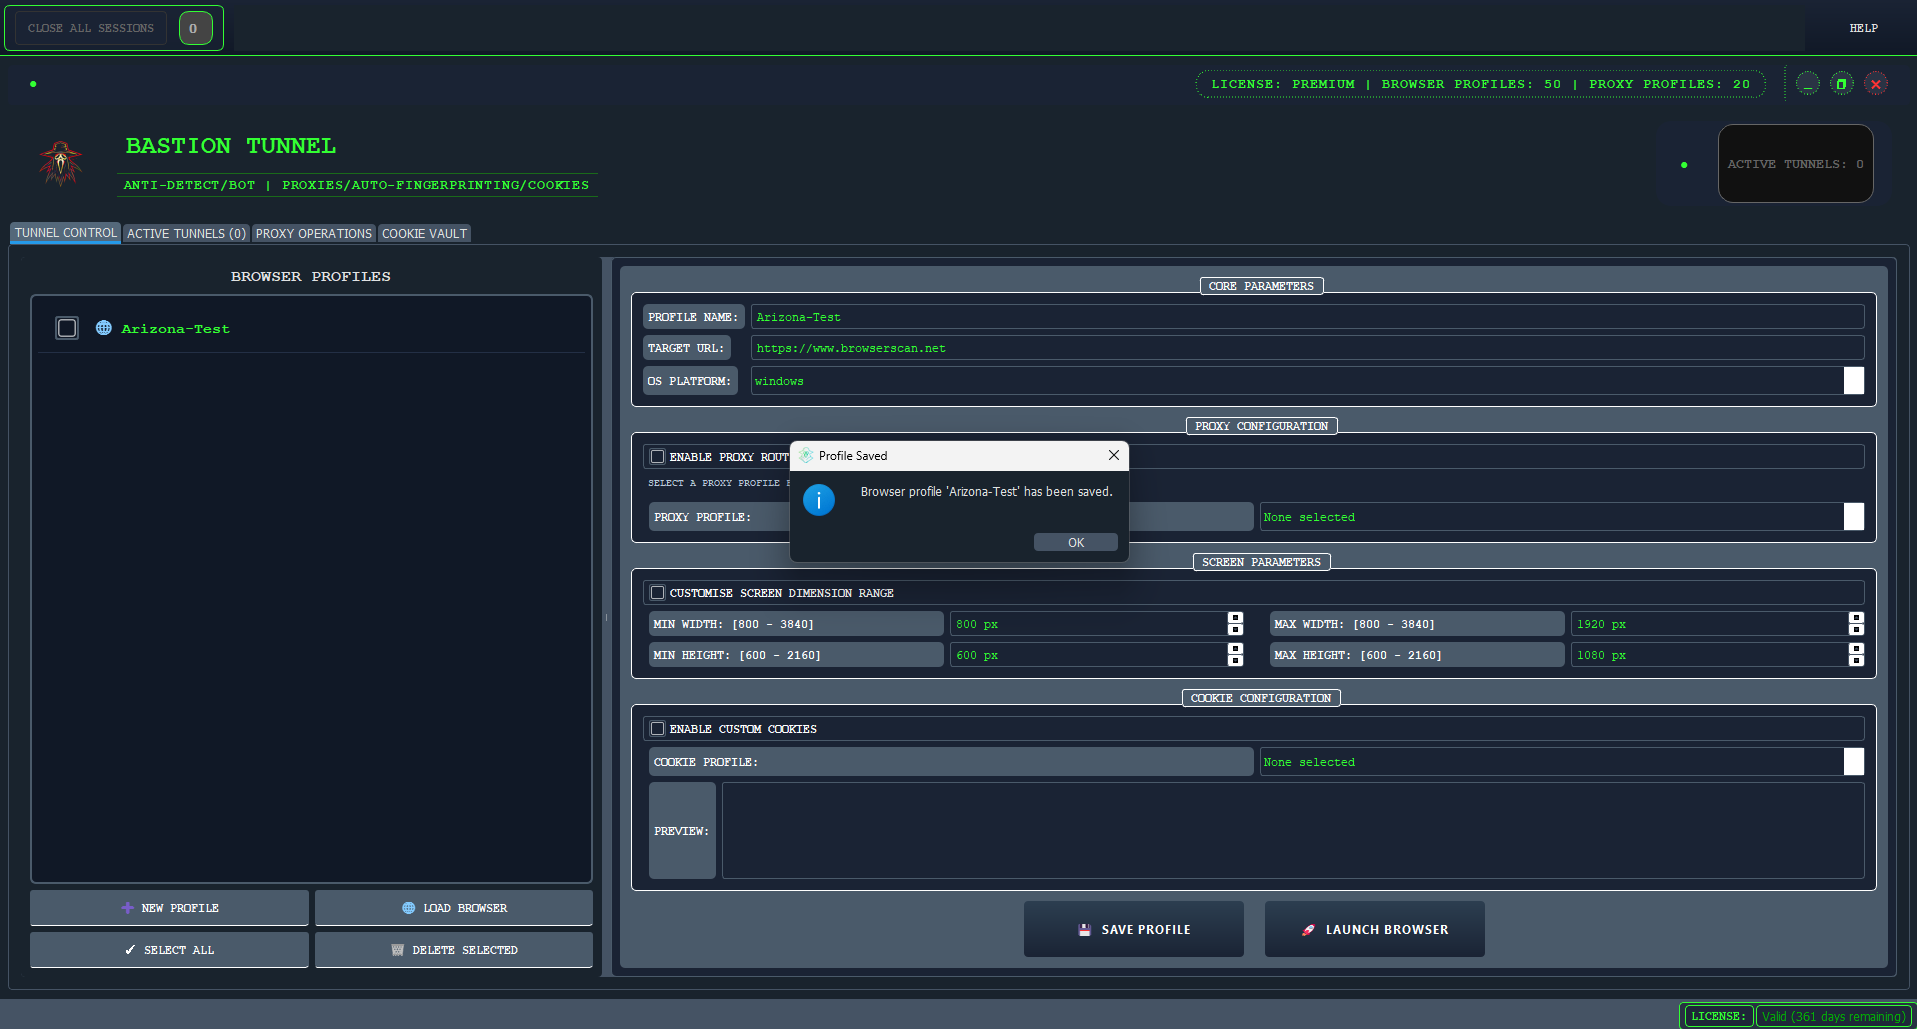
- Click "Save Profile" or "."
Tip: For maximum realism, try to match your fingerprint settings (OS, and timezone) to the intended persona or location of the profile, Bastion Tunnel will perfectly handle the browser version and geolocation.
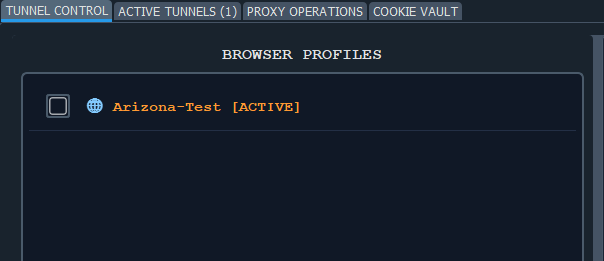
6 Launching and Using Your Profile
Once your profile is configured with the desired fingerprint and proxy:
- Find your newly created profile in the browser profile list on TUNNEL CONTROL and click on it.
- Then Click the LOAD PROFILE button to auto fill the settings and data associated with the profile.
- Then Click the "LAUNCH BROWSER" button to open the profile.
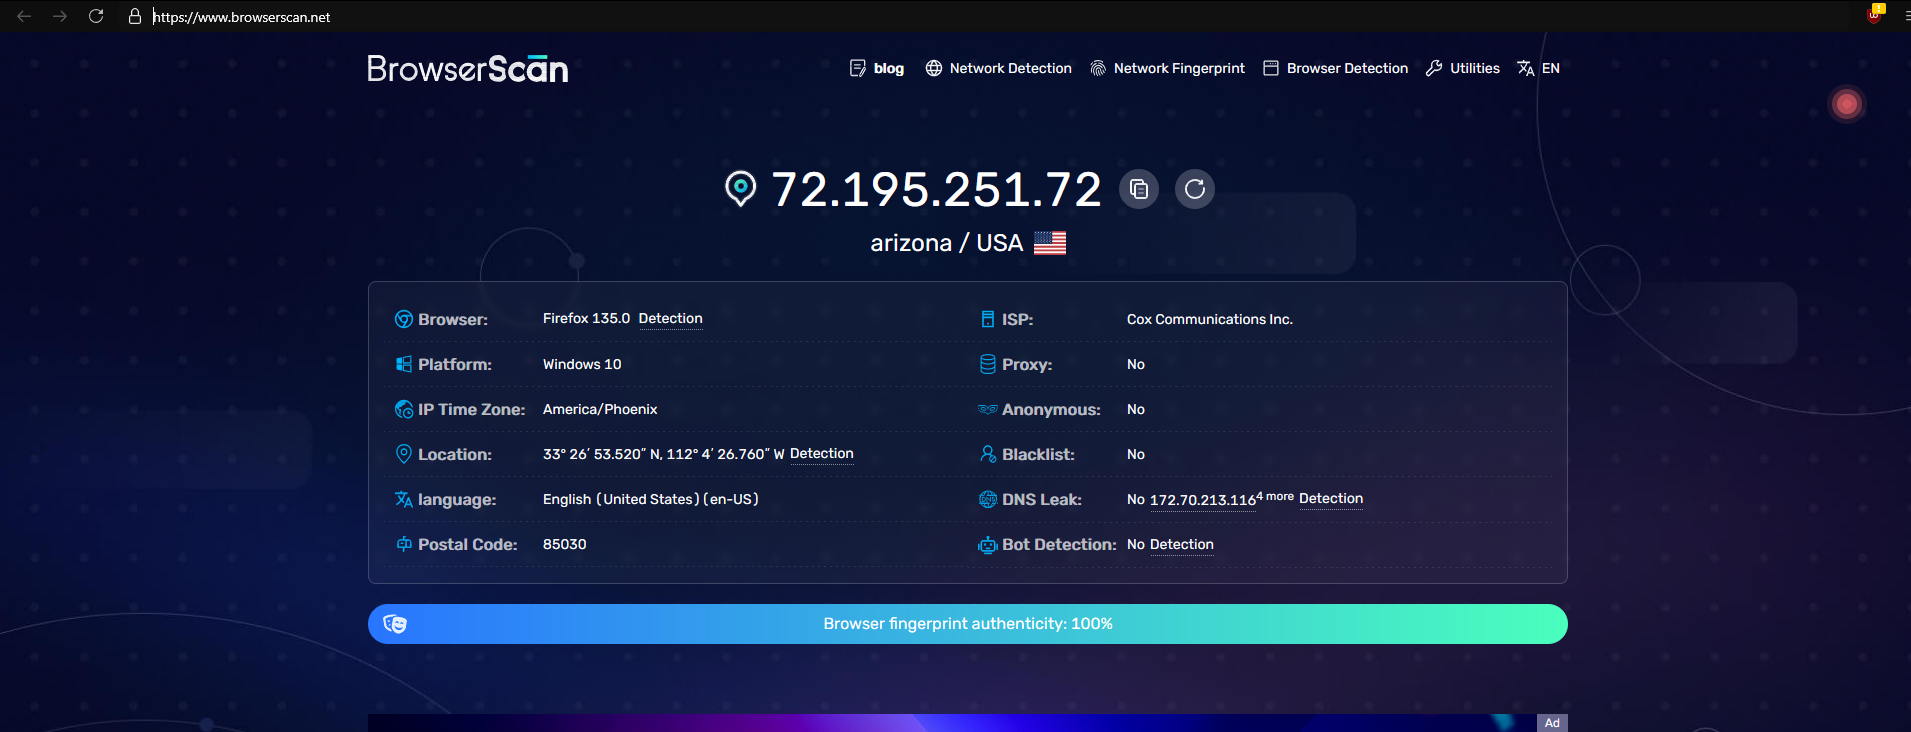
- A new browser window will open. This window is operating within the isolated environment and fingerprint settings you configured for that specific profile.
- You can now browse the web, log into accounts, or perform any online activity as that unique identity.
Remember, each profile is independent. Actions taken in one profile do not affect others... ENJOY !!!.